

Choosing a milling vise comes down to three checks: will the block fit, will the jaws hold it properly, and can the setup handle the cut? Start by measuring the block in each position you plan to use. Then check jaw width, usable opening, clamping force, and whether the vise fits your machine.
Jaw widths of 100, 125, 150, and 200 mm are useful sizes to compare, but they are examples, not a rule for every brand. The right vise also depends on how much of the block touches the jaws, how far it sticks out, the direction of the cutting force, and how the vise is mounted.
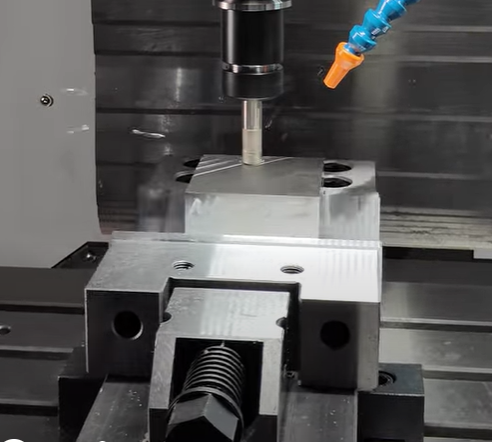
1. Know what the three main specs mean
| Specification | What it means | What to check |
|---|---|---|
| Jaw width | The length of the jaw face from end to end | Does the block have enough contact with the jaws in the position you plan to clamp it? |
| Jaw opening | The largest gap between the fixed and moving jaws | Can the usable opening fit the dimension that sits between the jaws? |
| Clamping force | The force the jaws apply under the stated operating conditions | Does the manufacturer's rating suit the planned cut? |
Jaw width and jaw opening are not the same thing. A vise with 150 mm-wide jaws may open much less than 150 mm. You also cannot work out clamping force just by looking at the vise or measuring its handle.
2. Pick a jaw width that suits the block
Vise sizes vary by brand and model. The examples below can help you compare options, but the workpiece and setup should make the final call.
| Jaw width | When it may suit the job | Check first |
|---|---|---|
| 100 mm | Small blocks or a crowded machine table | There is enough jaw contact and opening for the job. |
| 125 mm | Small or medium steel blocks | The block sits securely, with enough contact near its edges. |
| 150 mm | Medium blocks or a mix of workshop jobs | The vise leaves room for mounting and cutter access. |
| 200 mm | Larger contact faces or larger repeat jobs | The table and mounting setup can support the vise and expected loads. |
A wider jaw only gives you more contact when the block's shape makes use of that extra width. If a smaller vise holds the block securely and leaves more room for the cutter, the smaller option may be the better fit. A wider jaw does not, by itself, mean greater rated clamping force.
3. Check the jaw opening
Measure the dimension that will sit between the jaws for each setup. The longest side of the block is not always the dimension that sets the opening.
| Example block size | Dimension between jaws | Minimum opening to check |
|---|---|---|
| 120 × 80 × 60 mm | 80 mm | At least 80 mm of usable opening, plus room to load the block |
| Same block, turned around | 120 mm | At least 120 mm of usable opening, plus room to load the block |
| 150 × 100 × 50 mm | 100 mm | At least 100 mm of usable opening, plus room to load the block |
Soft jaws, replaceable jaw plates, and fixtures can take up space, so the opening you can actually use may be smaller than the catalog figure. Check the manufacturer's drawing with the jaws and accessories fitted, and leave enough room to load the workpiece.
Also check the whole toolpath. The cutter, tool holder, or spindle may hit the vise body even when the block fits between the jaws. This is easy to miss if you check only the opening.
4. Check clamping force against the cut
There is no single clamping-force figure that works for every steel block. The load depends on the cut, the block's shape, how it touches the jaws, how far it sits above them, and the direction of the cutting force.
Use the manufacturer's force rating together with the tightening torque or operating pressure stated for that model. Check that the rating applies to the jaw setup you plan to use, and stay within the manufacturer's operating limits.
| Setup condition | Why it matters |
|---|---|
| Heavy cutting | The workpiece, vise, mounting bolts, and machine table all take greater loads. |
| Small or uneven jaw contact | The rated force alone may not keep the block steady. |
| Block sticking well above the jaws | The extra height can make the block more likely to move or twist. |
| Cutting force pushing up or off-centre | The block may lift or tip, not just slide sideways. |
| Thin walls or partly machined sections | Too much clamping force can bend or distort the part. |
The whole setup must keep the block from sliding, turning, or lifting. Do not add an improvised handle extension or apply uncontrolled force to make an unsuitable vise work. Use a vise, jaw setup, or fixture rated for the job.
5. Choose jaws for the stock and finish
| Jaw type | Common use | What to keep in mind |
|---|---|---|
| Hardened serrated jaws | Raw steel stock when jaw marks are acceptable | The serrations can leave marks or dents. |
| Smooth jaws | Parts where visible jaw marks need to be reduced | Grip still depends on the surface, shape, and cutting load. |
| Custom soft jaws | Repeat jobs, unusual profiles, or second-operation machining | They need enough material and contact to handle the load. |
| Step jaws | Setups that need the part raised or more room below it | Check support, jaw contact, and cutter clearance. |
Serrated jaws can work well on raw stock if the marks will be machined away or do not matter. For a finished face, smooth jaws or a fixture may be a better choice. Custom soft jaws can locate repeat parts against the same profile, but they still need enough strength and contact for the cut.
6. Check support and vise condition
- Jaw contact: Make sure enough of the jaw face grips the block for the planned cut. Full-height contact is not always needed.
- Support: Seat the block firmly on the vise or parallels. It should not rock.
- Clean surfaces: Clear chips from the jaws and support surfaces before clamping.
- Workpiece height: Keep the block as low as the job allows. Use taller jaws or a fixture if you need more height.
- Wear and movement: For precision work, check the maker's data on jaw lift and repeatability. On a used vise, look for worn jaws, a damaged screw mechanism, worn thrust parts, and damaged mounting surfaces.
7. Match the vise to the operation
| Operation | Main check |
|---|---|
| Facing | The block sits firmly and the cutter clears the top of the vise. |
| Side milling | The block cannot slide or turn under the cutting load. |
| Heavy roughing | The vise, mounting, and machine table can handle the load. |
| Drilling or tapping | The block has enough support and cannot move or rotate. |
| Finish milling | The setup holds position without unwanted movement or distortion. |
| Batch work | Parts can be loaded in the same position, with suitable locating features or custom jaws. |
For manual milling, check that the table, travel, and available clearance suit the vise and block. You can compare the setup with the specifications of a turret milling machine.
If the job involves machining several faces on many blocks, a CNC duplex milling machine may be worth evaluating as a different production approach. Compare the machine's actual capacity with the block dimensions, tolerances, and batch size before deciding whether it fits the job.
Looking at a production setup for multiple machined faces?
Send the block dimensions, faces to be machined, target tolerances, and batch size to discuss the process options.
Discuss the Production Setup →8. Example: choosing a vise for a 120 × 80 × 60 mm steel block
Say the 120 mm side runs along the jaw faces, while the 80 mm side sits between the jaws.
- Jaw width: Start by checking a 150 mm jaw width. A 125 mm vise may also work, but it is only 5 mm longer than the block, leaving little room at either end. Check the real contact area and edge clearance before choosing it.
- Opening: The first setup needs at least 80 mm of usable opening, plus loading room. If you turn the block so the 120 mm side sits between the jaws, you need at least 120 mm of usable opening, plus clearance.
- Jaw type: Serrated jaws may suit raw stock if marks are acceptable. Smooth or custom jaws may be better for finished faces or repeat positioning.
- Clamping force: Check the planned cut against the manufacturer's force rating and operating limits.
- Machine fit: Check the mounting, table space, travel, and tool-holder clearance.
- Before cutting: Clean the contact surfaces, secure the vise, seat the block, and follow the machine and vise makers' setup instructions.
For this setup: a 150 mm jaw width and at least 80 mm of usable opening are sensible starting points to evaluate. Check the contact, clamping capacity, mounting, and cutter clearance before choosing a model.
9. What to check before buying
| Item | What to confirm |
|---|---|
| Jaw width and opening | A dimensioned drawing for the jaw setup you will use. |
| Clamping force | The rated force and the torque or pressure used to achieve it. |
| Jaw options | Compatible serrated, smooth, soft, or step jaws for the job. |
| Rigidity and repeatability | Manufacturer data that matches the accuracy you need. |
| Mounting | Base dimensions, slots, fasteners, and machine-table fit. |
| Tool clearance | Access to each required face along the full toolpath. |
| Service and cost | Replacement jaws, wear parts, fixtures, and mounting hardware. |
Before buying, get the jaw dimensions, clamping-force conditions, mounting details, and relevant accuracy data. Labels such as “heavy-duty” or “precision” do not tell you enough on their own.
10. Workholding safety
Secure the vise and workpiece before cutting. In the United States, OSHA's 29 CFR 1910.212 sets general machine-guarding requirements; follow the rules that apply to your workplace and the machine maker's instructions.[1]
Stop the machine and follow the approved safe procedure before measuring, repositioning, cleaning, or adjusting a workpiece near the cutting area. NIOSH also points to machine safeguards and operator training as parts of machine safety.[2]
Frequently asked questions
What jaw width is best for milling steel blocks?
Sizes such as 100, 125, 150, and 200 mm are useful starting points for comparison. Choose based on jaw contact, block orientation, table space, and cutter access.
How much jaw opening do I need?
The usable opening must fit the largest dimension placed between the jaws in each setup, with extra room to load the block.
How much clamping force is required?
Use the rating for the exact vise model and jaw setup, then check it against the cutting load and the way the block is held.
Conclusion
Pick the jaw width for the contact you need, the opening for the dimension between the jaws, and the clamping capacity for the cut. Then check support, mounting, rigidity, and tool clearance. The best choice is the vise that holds the block securely in every planned setup—not simply the biggest vise or the one with the highest force rating.
Planning a steel-block machining project?
Send your block dimensions, steel grade, required faces, tolerances, and batch size to discuss suitable machining options.
Send Project Details →